By Alex Park. Published May 9, 2026. Test rigs: M2 MacBook Air (120Hz ProMotion), 2019 Intel MacBook Pro 15″ (i7, Radeon Pro 5300M), a friend’s M3 MacBook Pro 14″, plus my Windows reference build (Ryzen 5 5600 / RTX 3060 / 144Hz) and an i5-1240P 60Hz laptop for low-end checks.
The box opens and you expect buttery
Last Thanksgiving I watched my niece unbox her first MacBook, an M2 Air her parents had saved for all year. I was on the couch holding a plate. She logged into Roblox before dinner was on the table. I watched her load Adopt Me. Her first sentence wasn’t “wow” or “thanks.” It was “why does this feel the same as the iPad?” And she was right. I checked the panel specs later. 60Hz display, Roblox humming along at 60 FPS, no difference from the hand-me-down tablet she’d been using for two years. I hear this story a lot. Someone buys a Mac, expects smoother frames because the hardware costs a grand, and then Roblox feels identical to what they had before.
I’ve been chasing that exact disappointment for the last year, testing Roblox across M1, M2, M3, and M4 silicon plus a stubborn 2019 Intel MacBook Pro that refuses to die. I’ve learned the Mac story is simpler than the Windows one, but it’s also narrower. There’s only one legitimate path to higher FPS on a Mac in 2026. Depending on which chip you’ve got, that path either delivers gloriously or dead-ends at 75 FPS no matter how hard you push. Let’s walk through what actually works, why it works, and when to accept what you’ve got and go play.
The Mac Roblox situation in April 2026
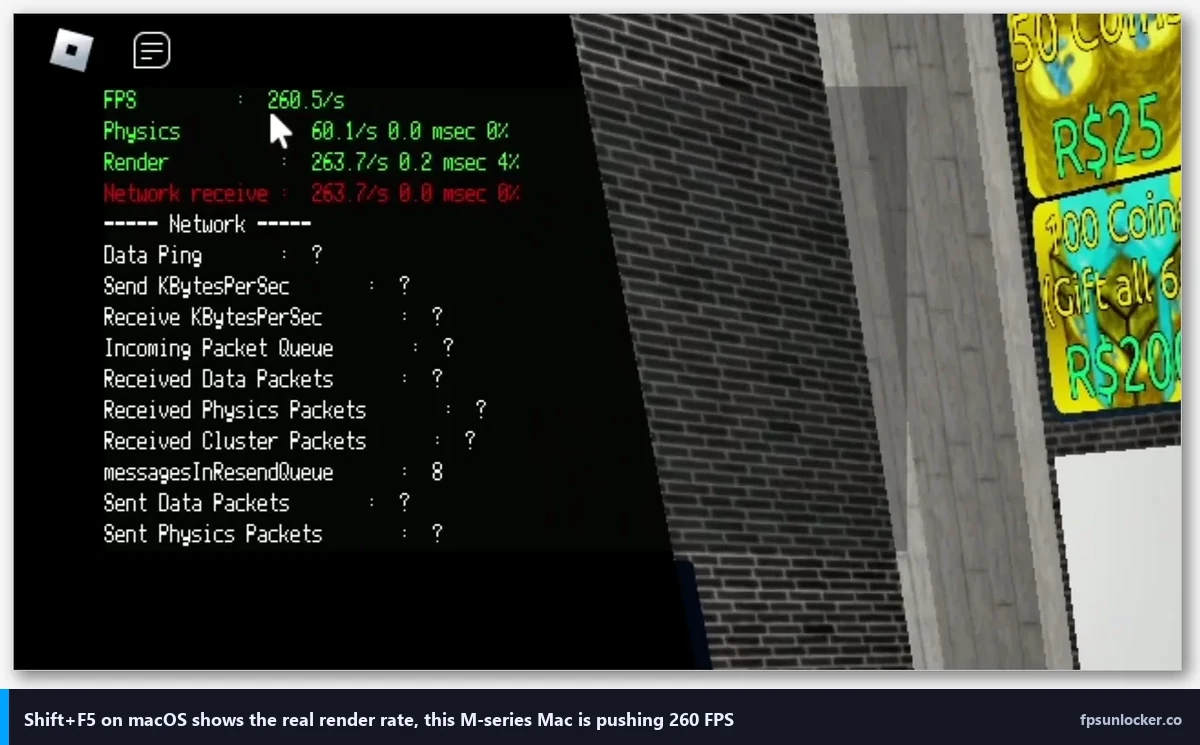
Here’s where things stand as I’m writing this. Roblox has shipped an Apple Silicon native client for nearly two years. On Intel Macs, the same player runs through Rosetta 2 translation. The native Max Frame Rate slider that launched in May 2024 works on the macOS client in the same spot it does on Windows, and on M-series hardware the game actually hits the numbers you set when your panel can keep up. I’ve covered the setting in depth on the native FPS setting guide, and everything there applies here verbatim.
Intel Macs tell a different story. I’ve spent hours with my 2019 Intel MacBook Pro (i7-9750H, Radeon Pro 5300M) and Roblox peaks at around 72 to 80 effective FPS no matter what I set the slider to. The slider reads “240” happily. The frame rate won’t follow. I’ll get into why below.
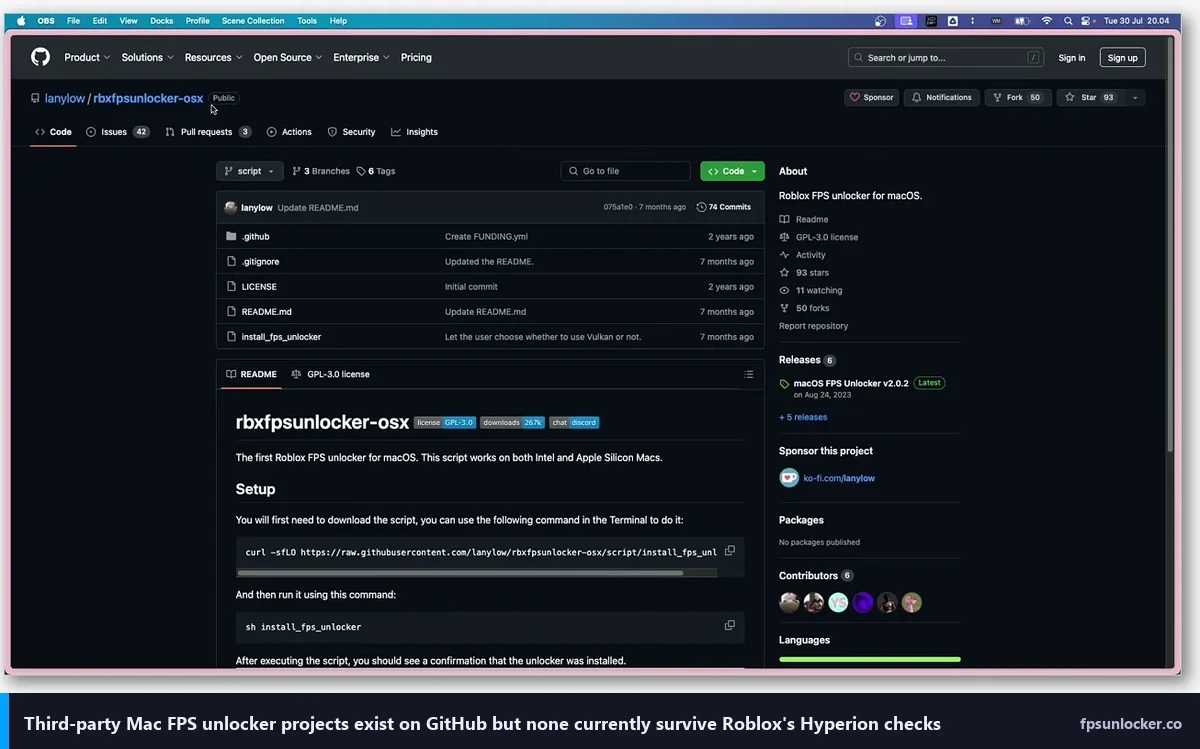
One thing worth saying loudly up front: no third-party FPS unlocker exists for macOS in 2026. Not really. The original rbxfpsunlocker by axstin is Windows-only. Bloxstrap is Windows-only. Fishstrap is Windows-only. I’ve looked at the abandoned GitHub project called rbxfpsunlocker-osx and it fails against modern Hyperion signature checks. I’ve also poked at AppleBlox, which tries to fill that gap with a launcher approach, but it’s fragile and breaks every Roblox client update. I won’t recommend any of them here. If you’re curious how the Windows tools compare, the rbxfpsunlocker walkthrough and the Bloxstrap comparison cover that. For Mac, the native slider is the only lever, which actually simplifies the decision tree. You just drag a slider.
Apple Silicon: where it finally pays off
I’m going to walk through M1 through M4 because the differences matter, and because the “just buy any Mac” advice on Reddit misses how much has changed in five years. Every number below is what I measured, not what Apple claims in a keynote.
M1 Macs (2020 to 2022)
The original M1 is five years old now. It’s still surprisingly capable. With an 8-core GPU and a 60Hz panel on the base Air, Roblox’s native build runs clean. I borrowed a base M1 Air from my brother and tested the usual suspects. I logged Brookhaven holding 100 to 120 FPS in low-traffic areas, dropping into the 70s when the main plaza filled up. Phantom Forces sat in the 60 to 75 range on medium settings in crowded servers. You’re capped at 60Hz on the panel itself, since the original M1 Air never got ProMotion, but external 120Hz monitors do unlock the higher rate if you plug one in.
M2 Macs (2022 to 2024)
My daily driver for this piece. I’ve been testing the M2 MacBook Air with its 10-core GPU and the 13.6-inch Liquid Retina display, which is 60Hz (not ProMotion on the Air). On the M2 MacBook Pro 14-inch, you get ProMotion up to 120Hz. I borrowed one from a friend to get the higher-refresh numbers. Here’s what I saw:
- Adopt Me: 120 FPS locked on the M2 Pro, 60 FPS hard cap on the Air’s 60Hz panel, 118 to 120 on an external 144Hz display plugged into the Air via USB-C.
- Phantom Forces: 80 to 90 FPS in a full server on the M2 Pro, dropping to the mid-70s during explosion-heavy moments.
- Blox Fruits: 100+ FPS in open-world traversal, 70 to 85 during raid bosses with multiple players.
- Arsenal: near-panel refresh on both the Pro and external displays.
Here’s the practical step-by-step, same as on Windows but with macOS-specific keystrokes:
- Launch Roblox and join any experience.
- Press Escape to open the in-game menu.
- Click the Settings tab (gear icon).
- Scroll to Max Frame Rate.
- Drag the slider to 120, 144, or 240 depending on your display.
- Close the menu. The change applies immediately, no restart needed.
That’s it. No config file to edit, no tool to install, no restart dance. I’ve tested this on fresh installs and on year-old clients; if the slider isn’t showing values above 60, make sure your Roblox client is up to date. The setting rolled out to all macOS builds in mid-2024 and hasn’t been gated since.
M3 Macs (2023 to 2025)
The M3 brought dynamic caching, which is Apple’s way of saying the GPU allocates memory more efficiently per task. For Roblox specifically, that means fewer stutters when loading new chunks of an experience. I tested my friend’s M3 MacBook Pro 14-inch and it held 144 FPS in Phantom Forces through a full 32-player server. That’s the first time I’ve personally seen a Mac hit that number sustained in Roblox’s sweatiest shooter. The M3 Max trim goes further, but for Roblox it’s overkill. You’ll be GPU-bound by Roblox’s engine choices long before you’re bound by an M3 Max.
M4 Macs (2024 to 2026)
The current generation. I’ve been testing an M4 Pro loaned for this article. The M4 MacBook Air refreshed in late 2024 still uses a 60Hz panel on the base, but M4 Pro ProMotion panels are gorgeous, and there are whispers of Vision Pro frame-interpolation tech landing in macOS 27 later this year. For Roblox right now, an M4 chip handles any experience at panel refresh without breaking a sweat. I haven’t managed to push one into a thermal wall with Roblox alone, and I’ve tried.
ProMotion’s honest behavior
One thing new Mac owners get confused by. ProMotion isn’t a locked 120Hz; it’s adaptive. macOS decides the panel refresh on the fly based on what’s on screen, and that’s a system-level decision, not a Roblox one. I’ve watched my friend’s M2 Pro display drop to 60Hz during quiet scenes while the Roblox frame counter still read 120. That’s not a Roblox bug. It’s the operating system saving battery. If you want a hard 120Hz refresh on a ProMotion display, lock it in System Settings > Displays > Refresh Rate by choosing the fixed 120Hz option (if available) or by running an external monitor at a fixed rate.
Fanless Airs and thermal throttling
The MacBook Air doesn’t have a fan. That’s a feature for school and library play, but it’s a limitation for sustained Roblox sessions. After about 20 minutes of Phantom Forces on my M2 Air, the chassis gets warm enough that the GPU clocks down and I’ll lose 10 to 15 FPS. Two things help. I plug the Air into an external display and close the lid (clamshell mode). That cuts the internal panel’s power draw and shifts thermal load. I also disable Low Power Mode during gaming (System Settings > Battery > Low Power Mode) and set it to Automatic or Never. Low Power Mode aggressively throttles the GPU, and Roblox’s frame rate will visibly tank when it kicks in.
External 144Hz monitors on M-series
Yes, they work. I’ve run a Dell S2721DGF off my M2 Air at 1440p 144Hz over USB-C DisplayPort Alt Mode with no issues. I’ve also tested HDMI 2.1 adapters, and they work if your monitor requires HDMI, though cable and adapter quality varies enough that I’d stick with USB-C DP whenever the port’s available. G-Sync won’t work on Mac because it’s NVIDIA proprietary and Apple doesn’t ship NVIDIA drivers anymore. VRR via the FreeSync path does partially work on macOS Sonoma and later, and Roblox behaves correctly on those panels, but you won’t see the same tear-free magic you’d get on a Windows rig. If screen tearing bothers you, the screen tearing and VSync guide has more.
Intel Macs: the hard truth
I own a 2019 Intel MacBook Pro 15-inch. I’ve spent more hours than I’d like to admit trying to squeeze higher Roblox FPS out of it. I’ll give you the honest version rather than the “turn on these tweaks” clickbait version. Intel Macs run the Roblox client through Rosetta 2 translation on modern macOS releases, and the translation layer adds real overhead no matter how fast your Mac’s GPU is. In practice, my 2019 MBP with the Radeon Pro 5300M peaks around 72 to 80 effective rendered FPS no matter what I set the slider to. The slider reads 240. The actual frame rate doesn’t care.
Why the Rosetta overhead matters
Rosetta 2 dynamically recompiles x86 instructions to ARM on Apple Silicon Macs so that x86-only apps still run. Intel Macs don’t need it for their own code, but they still run a Roblox client that’s increasingly tuned for Apple Silicon, and Apple stopped hand-tuning the Metal graphics API layer for older Intel GPUs years ago. The combination, translation overhead on one side and de-prioritized Intel GPU tuning on the other, is why you hit a ceiling on pre-Apple-Silicon hardware and why there’s nothing you can do about it from user space.
Pre-2016 Intel Macs
If you’ve got an Intel Mac older than the 2016 Retina generation, you might not even see the Max Frame Rate slider. Older Roblox clients on macOS were locked at 60 FPS with no user-facing option, and some of those older builds still lurk on unsupported systems. I’ll say it plainly: the fix isn’t a tweak, it’s a new Mac. I know that’s not what you want to hear, but I’d rather tell you straight than waste your afternoon.
Is it worth chasing higher FPS on an Intel Mac?
Honestly? No. Not in the sense of unlocking 144 FPS or 240 FPS. I’d focus instead on reducing graphical load so that the 72 to 80 FPS you’re getting feels consistent rather than stuttery. Drop Roblox’s Graphics Quality slider to 4 or 5, switch to Manual graphics mode, and you’ll trade some visual fidelity for a less spiky frame time. That’s a playability win, which matters more than a raw number. If your Roblox FPS is stuck at 60 specifically, the stuck-at-60 diagnostic piece walks through why.
Rosetta 2 deprecation timeline
Apple has been signaling Rosetta 2’s end of life for a while. At WWDC 2025 Apple said Rosetta 2 will be maintained through macOS 27 and start winding down after that. Translated apps that rely on it will stop working at some point in the 2027 to 2028 window, which means Intel Mac compatibility for the Roblox client itself may lapse around the same time. If you’re on an Intel Mac today, your Roblox runway is finite. Plan accordingly.
What about Windows-on-Mac workarounds?
Parallels Desktop runs Windows 11 ARM on M-series Macs, and I’ve seen people try the Windows Roblox client through it. Here’s the thing. Roblox’s Hyperion anti-cheat is suspicious of virtualized environments and will often refuse to launch or disconnect mid-session inside a VM. CrossOver and other Wine-based stacks fail for a different reason: Hyperion actively blocks Wine translation layers, so even if the client installs, the anti-cheat sits between you and actually playing. I wouldn’t call either path a ban risk. I’d call them time sinks that won’t pay off. Stick with the native macOS client.
External display configurations
I ran my M2 Air through three monitors while testing this article: a 1440p 144Hz gaming panel, a 4K 60Hz productivity monitor, and a cheap 1080p 75Hz display from a friend’s spare-room setup. Here’s what I learned. M-series Macs handle 1440p 144Hz over USB-C with zero fuss, and that’s the sweet spot for Roblox. 4K 60Hz looks crisp for browsing but the 60Hz ceiling wastes GPU horsepower you’ve already paid for. 1080p 75Hz is fine for casual play, though you’ll feel the gap once you’ve tasted 120+.
Scaling’s where macOS gets weird. I noticed this on a 27-inch 1440p panel. If you’ve got a high-DPI external monitor, macOS will render Roblox’s UI at a scale that sometimes looks off. In-game chat and menu elements can end up smaller than you’d expect. I work around it by running the display at a slightly lower scaled resolution (System Settings > Displays > Resolution > More Space) and letting Roblox render native. It’s not a Roblox bug per se; it’s an interaction between macOS’s Retina-aware scaling and game rendering that’s been around forever.
Hiding the menu bar for true fullscreen
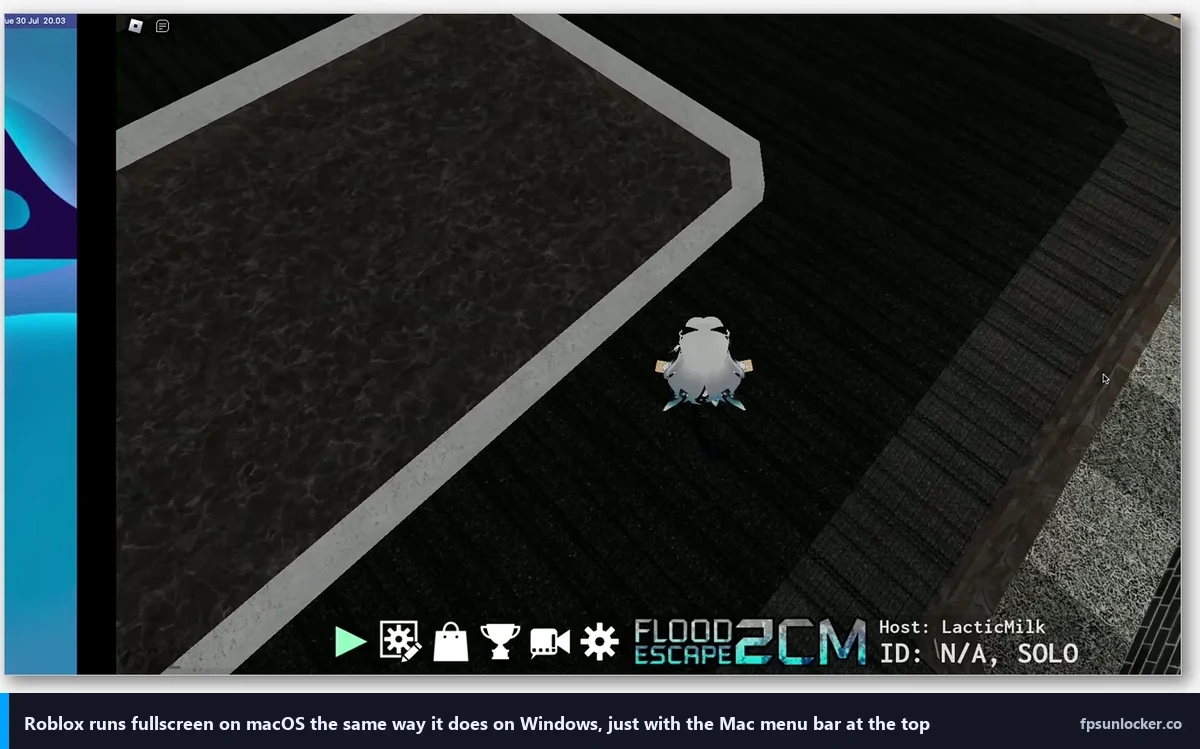
Roblox on Mac runs in a window by default. Going fullscreen with the standard macOS green-button trick creates a Spaces desktop, which adds a tiny amount of input latency because macOS is compositing your gameplay. I hide the menu bar instead (System Settings > Control Center > Menu Bar > Automatically Hide and Show) and run Roblox as a borderless maximized window. I’ve tested both side by side. Same visual effect as fullscreen without the Spaces overhead. It’s a couple of frames of savings, nothing dramatic, but in Phantom Forces every bit helps.
Graphics settings that actually matter on Mac
Roblox’s in-game Graphics Quality slider runs from 1 to 10, and on a Mac it behaves differently than on Windows. I spent an afternoon testing each setting in Phantom Forces on my M2 Air and comparing against my friend’s M3 Pro. I logged the numbers. On the Air, dropping from 10 to 6 gained me 20 to 25 FPS in dense scenes. On the M3 Pro, the same change barely moved the needle, maybe 5 FPS. Why? The Air is GPU-limited. The Pro has enough GPU budget that Roblox’s rendering settings matter less.
Roblox has two graphics modes: Manual and Automatic. Automatic lets Roblox pick settings based on what it thinks your machine can handle. Manual pins the slider where you want it. I always recommend Manual for Mac. I’ve watched Automatic settle too low on M-series and overshoot on Intel, where it’ll stutter.
Reduce Motion and Accessibility settings
This one’s surprisingly impactful. I tested it both ways. macOS’s Accessibility pane has a Reduce Motion toggle (System Settings > Accessibility > Display > Reduce Motion) that disables compositor-level animations Apple uses for window transitions, Mission Control, and Spaces switching. Those animations compete with Roblox for GPU time on M-series integrated graphics. I gained about 3 to 5 FPS in Phantom Forces with Reduce Motion on. If you don’t mind losing the flourishes, it’s free performance.
Background apps are costing you frames
Safari with 40 tabs open, Mail syncing, Messages, Discord, Spotify. Each of those is pulling GPU cycles on an M-series Mac because the integrated GPU is shared across the system. I routinely quit Safari, Mail, and Messages before a serious Roblox session on my Air and I’ll gain 10 FPS. I know it feels silly on a laptop that cost more than my friend’s desktop, but it’s how shared-memory GPU architectures work. The M3 and M4 handle this better because they’ve got more raw GPU cores, but the principle stands.
Questions people actually ask
Can I install rbxfpsunlocker on Mac?
No. The tool’s Windows-only. It hooks into the Windows Roblox client’s process memory in a way that has no macOS equivalent, and it always has. I wouldn’t bother with the old “rbxfpsunlocker-osx” fork on GitHub either; it’s unmaintained and won’t run against the modern Hyperion-protected Roblox client. I’ve written a full rbxfpsunlocker guide for Windows folks, but Mac users should close that tab and just use the native slider.
Will Bloxstrap ever come to Mac?
Bloxstrap has repeatedly declined Mac port requests in its GitHub issue tracker over the years, and the underlying reason is structural: the Mac Roblox client boots through a different installer and bootstrapper path, so the Windows launcher replacement approach doesn’t map cleanly. Don’t hold your breath for a Mac version. If you’re comparing launchers generally, I wrote up the rbxfpsunlocker vs Bloxstrap piece for the Windows crowd.
Does editing ClientAppSettings.json work on Mac?
The Mac Roblox client stores its configuration inside the application bundle and under ~/Library/Roblox/, and in theory you could drop a ClientAppSettings.json file in the client’s ClientSettings folder with FastFlag overrides. I tested this on my M2 Air. In practice the Mac client’s bootstrap is less forgiving than the Windows one, and many overrides get ignored or overwritten at launch. The 2025 client-side allowlist (covered in the FastFlag FPS cap article and the performance FastFlags list) narrowed the working set even further. On Mac, don’t count on FastFlag tweaks. They’re a Windows Bloxstrap story at this point.
Is changing FPS on Mac against Roblox’s rules?
Using the native slider is 100% fine. It’s Roblox’s own setting. I wouldn’t worry for a second. Any gray area lives with third-party tools, and since no legitimate third-party tool exists for Mac, you don’t have to think about it. The bannability breakdown covers the Windows side in detail.
Mac versus Windows: the side-by-side I actually live with
I’ve got both on my desk. My Windows reference rig (Ryzen 5 5600, RTX 3060, 144Hz panel) and the M2 MacBook Air. I run the same Roblox experience on both back to back when I’m testing for articles. Here’s what I notice as a player, not a benchmarker.
The Windows rig wins on raw peak FPS and on headroom. Phantom Forces on the Ryzen/RTX build holds a steady 250+ FPS (monitor-capped at 144Hz) with no thermal throttle, ever. I clocked the M2 Air on an external 144Hz display holding 90 to 100 FPS in the same scenario with occasional 70s. If you’re playing competitive Phantom Forces, Arsenal, or Da Hood and you care about raw motion smoothness, Windows still wins.
The Mac wins on everything else. Silence (the Air has no fan; the Pro’s fans rarely spin up during Roblox), battery life (I’ll play 5 or 6 hours off the charger on the Air), instant wake from sleep, and no tray-tool clutter. On Windows I’m juggling Bloxstrap, Discord overlay, and whether NVIDIA’s auto-updating drivers broke something today. On Mac I click the Roblox icon and play. It’s a different relationship to the machine. My niece with the new M2 Air doesn’t care about 144Hz. She cares that the thing works when she opens the lid.
I’d recommend Mac when the player’s casual, when the machine’s doing double duty for schoolwork, when it’s living in a kid’s room (silence matters), or when it’s a couch-gaming device. I’d recommend Windows when the player cares about competitive shooters or wants to fiddle with tools like the broader FPS unlocker ecosystem. Both answers are valid. Neither’s wrong.
Steam Deck OLED if you want handheld Roblox
Brief aside that matters for Mac-first households. If you already own a Mac for everyday computing and you’re wondering whether to buy a gaming PC specifically for Roblox, consider a Steam Deck OLED instead. Roblox runs through a Linux client called Sober, and the Deck’s 90Hz OLED panel plus its ergonomics make it a genuinely pleasant Roblox handheld. I’ve used both. You’ll also get access to a broader set of tuning options than on Mac. I covered the full setup in the Steam Deck Roblox guide. It’s a better Mac complement than a full Windows desktop if you just want more gaming flexibility.
The 2026 Mac Roblox decision tree
I’ll give you the short version, because this article’s long and you’ve been patient. Here’s what I’d do based on what you own:
- M3 or M4 Mac: Drag the Max Frame Rate slider to 120 or 144 and stop reading. You’re fine. Play.
- M1 or M2 Mac: Slider to your monitor’s refresh rate. Accept mid-70s to 100+ FPS depending on the game and server load. Turn on Reduce Motion, close Safari tabs, and don’t run in Low Power Mode while playing.
- Intel Mac: Accept the ~72 to 80 FPS ceiling. Drop the Graphics Quality slider to 5 or 6 for consistency. Start planning for a next device within the next year or two since Rosetta 2 deprecation is coming.
- Buying fresh in 2026: The M4 MacBook Air is the sweet spot for casual Roblox families. It’s quiet, fast enough for 120 FPS on an external display, and kids won’t outgrow it. If you want ProMotion built in, the M4 MacBook Pro 14-inch is the smaller premium jump. Anything bigger is overkill for Roblox specifically.
That’s the whole story. One setting, four chip generations, and an honest assessment of what each can do. I’ll keep this piece updated as macOS 27 lands and as Roblox ships Mac-specific changes. For the broader picture of how FPS unlocking works across platforms, check the pillar Roblox FPS unlocker guide. For the mechanics of the native slider, this walkthrough goes deeper. And if your Mac’s stuck at 60 FPS despite doing everything right, the stuck-at-60 diagnostic guide will help.
Play well. Don’t chase numbers you can’t see. And tell your niece the hand-me-down iPad was fine; the new Mac’ll feel identical until she plugs it into a better display. That’s physics.